
Main Courses
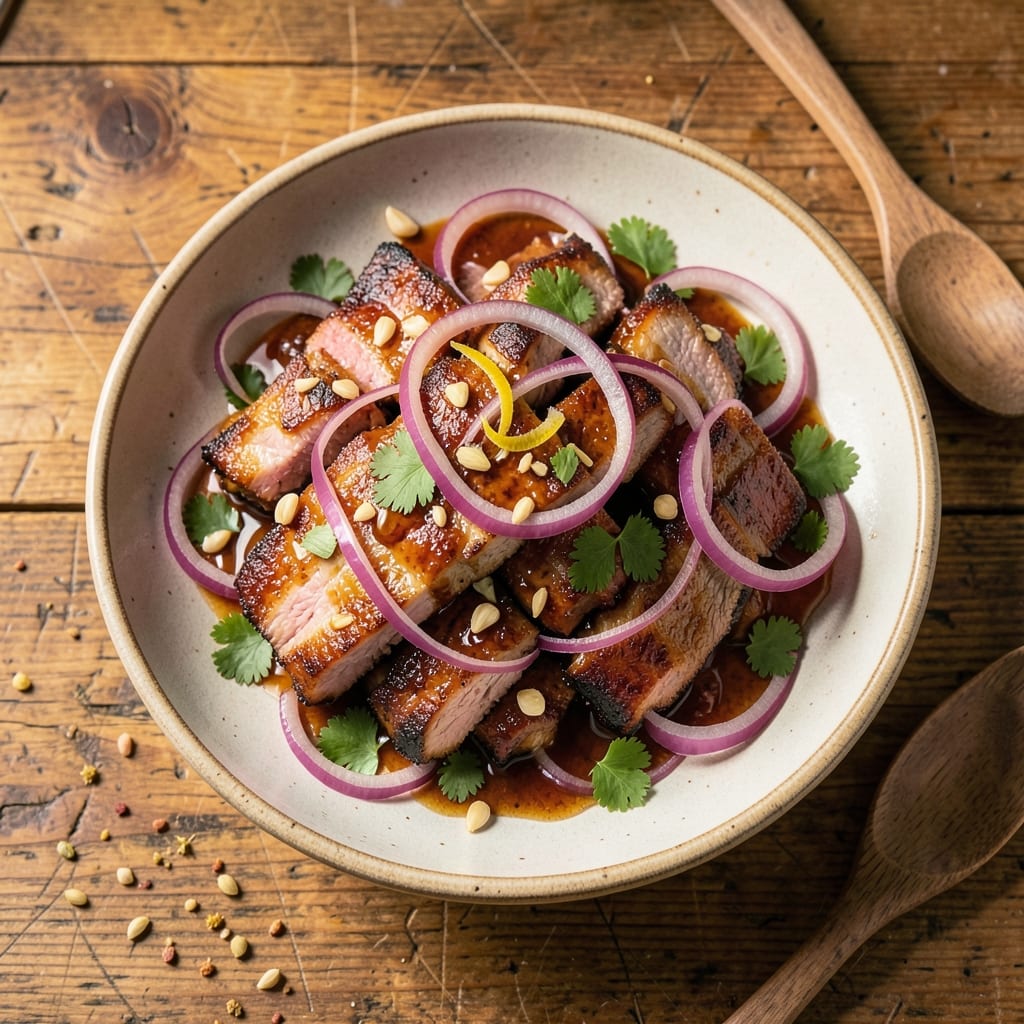
This BBQ pork strips recipe delivers smoky-sweet, crispy bites in just 20 minutes—no long marinating or slow cooking required. As a pitmaster trained in French technique, I've perfected a method that balances tender meat with a caramelized glaze, using a blend of spices and a quick sauce that clings perfectly. The secret lies in high-heat searing followed by a fast glaze that locks in moisture while creating that coveted crispy exterior.
What sets these pork strips apart is the dual-texture approach: the meat stays juicy and tender inside while developing a crispy crust that holds onto the sticky-sauce glaze. We'll use a simple dry rub for initial flavor development, then finish with a homemade BBQ sauce that's tangy enough to cut through the richness while adding that signature smoky depth. This isn't your typical soggy takeout—every bite delivers the perfect balance of sweet, smoky, and slightly spicy notes.
The process is straightforward but yields restaurant-quality results: thin-cut pork strips get seared in a hot pan, then tossed with our signature sauce while still sizzling. This ensures the glaze caramelizes instantly, creating those irresistible crispy edges. The strips come out of the pan with a beautiful sheen, ready to be piled high on buns or served with classic sides. What you'll end up with is a dish that's quick enough for weeknights but impressive enough for guests.
Pair these with classic BBQ fixings like coleslaw and cornbread, or serve them as a standalone appetizer that disappears faster than you can say "second round." The beauty of this recipe is its versatility—it works equally well for game day, family dinners, or when you're craving that smoky-sweet satisfaction without the hours in the smoker. Let's get cooking with these foolproof, flavor-packed pork strips.
Ingredients for bbq pork strips
Thin-cut pork strips, smoky spices, and a quick-sauce glaze—all you need for restaurant-quality bites in 20 minutes.
| Ingredient | Amount | Notes |
|---|---|---|
| Boneless Pork Shoulder Strips 🥓 | 1 ½ lb | Thin-cut, 1/4-inch thick preferred |
| Yellow Onion 🧅 | 1 whole | Medium, thinly sliced |
| Garlic Cloves 🧄 | 4 cloves | Minced, fresh preferred |
| Smoked Paprika 🌶️ | 1 tbsp | For deep smoky flavor |
| Ground Black Pepper 🌶️ | 1 tsp | Freshly cracked for heat |
| Kosher Salt 🧂 | 1 ½ tsp | Diamond Crystal preferred |
| Brown Sugar 🍯 | 2 tbsp | Light or dark variety |
| Apple Cider Vinegar 🍏 | 2 tbsp | For tangy depth |
| Tomato Paste 🍅 | 1 tbsp | Squeeze tube preferred |
| Water 💧 | ½ cup | Room temperature |
| Vegetable Oil 🫒 | 2 tbsp | High smoke point |
| Neutral Vegetable Oil 🫒 | ¼ cup | For sauce thinning |
| Honey 🍯 | 1 tbsp | Wildflower preferred |
| Worcestershire Sauce 🍶 | 1 tbsp | Vegan version if needed |
| Fresh Cilantro 🌿 | ¼ cup | Chopped, for garnish |
The pork strips are everything here. Look for thin-cut boneless pork shoulder—the 1/4-inch thickness cooks perfectly without drying out. Costco or Trader Joe's usually carry pre-cut strips, but if you're buying a whole shoulder, ask the butcher to slice it thin. Freshness matters: the meat should be bright pink with good marbling. For extra insurance, pat the strips dry before cooking—they'll sear better and crisp up faster. The smoked paprika is non-negotiable for that authentic BBQ depth; Penzeys or the bulk section at Whole Foods have the best quality.
No smoked paprika? Substitute with a mix of regular paprika and a pinch of liquid smoke—just don't overdo it. Running out of apple cider vinegar? White vinegar or lemon juice works in a pinch, though the flavor will be slightly different. The tomato paste can be the squeeze-tube kind from Trader Joe's—it's perfect for small batches and lasts forever. For a quicker prep, make a double batch of sauce and freeze half in ice cube trays. The strips can be prepped ahead too: toss them with the dry rub and refrigerate for up to 4 hours before cooking. Just let them sit at room temperature for 10 minutes before searing for even cooking.
These strips reheat beautifully—toss them in a hot pan with a splash of water for 2-3 minutes to revive the crispiness. The sauce keeps well too: store it in a jar in the fridge for up to 1 week or freeze for 3 months. For meal prep, assemble the strips and sauce separately, then toss together just before serving. The glaze will caramelize again when reheated, creating that perfect crispy edge. Garnish with fresh cilantro right before serving—it adds a bright pop of color and freshness that makes the dish feel special.
Why You'll Love This Recipe
- One-Pan Magic: I swear by this recipe because it’s actually one pan—no fussing with multiple dishes. Toss the pork strips with sliced onion and garlic, sprinkle on that smoked paprika, and let the oven do the work. Even my kid can handle it (and she’s not a kitchen helper).
- Smoky Kick: That smoked paprika? It’s the secret weapon—deep, warm, and just a little spicy without overpowering. The pork gets tender enough to shred but holds its shape, so you get that perfect bite every time. (Yes, even my picky husband asks for seconds.)
- Meal Prep Hero: Make a double batch on Sunday, and you’ve got lunch covered for the week. The strips reheat like a dream—crispy edges, juicy inside—whether you’re throwing them in a wrap, over rice, or straight from the fridge. Honestly, I’ve survived more than one “I’m too tired to cook” night thanks to this.
- Budget-Friendly Feast: Pork shoulder is cheap, and it stretches far. A single package feeds four for dinner and leaves enough for leftovers that actually taste better the next day. Between us, this is how I feed my family without breaking the bank—or my sanity.
Step-by-step instructions for smoky-sweet crispy pork strips
Here's how to transform simple pork strips into restaurant-quality BBQ bites with perfect texture and bold flavor.
Prep and Season the Pork for Maximum Crisp
Pat the 1.5 lb boneless pork shoulder strips completely dry with paper towels—this is crucial for that crispy exterior. I like to work in batches if they're wet from packaging. Place them in a large bowl and add the 1 tbsp smoked paprika, 1.5 tsp kosher salt, 1 tsp ground black pepper, and 2 tbsp brown sugar. Toss gently but thoroughly so every strip gets an even coating.
Let the seasoned pork sit at room temperature for 10-15 minutes while you prep the rest. This brief resting period ensures even cooking. The reason we don't skip this? Cold meat steams instead of sears, and you'll end up with soggy strips instead of crispy ones. Trust me, that 15-minute wait makes all the difference.
Sear the Pork Until Deeply Browned
Heat 2 tbsp vegetable oil in a large skillet over medium-high heat until shimmering—you should see small bubbles forming when you drop a strip in. Add half the pork strips in a single layer (don't crowd the pan) and cook undisturbed for 2-3 minutes until they develop a deep golden-brown crust on one side.
Here's where it gets important: flip only once and let them sear completely. You'll know they're ready when they release easily from the pan. If they're sticking, your oil isn't hot enough—give it another minute. Once browned, transfer to a plate and repeat with the remaining strips. Don't walk away; pork burns quickly once it starts browning.
Build the Smoky-Sweet Sauce
Reduce the heat to medium and add 2 tbsp vegetable oil to the same skillet. Toss in the 1 whole thinly sliced yellow onion and cook for 3-4 minutes until softened but not browned. Add the 4 minced garlic cloves and cook for 30 seconds until fragrant—this prevents bitter garlic flavor.
Stir in the 1 tbsp tomato paste, 2 tbsp apple cider vinegar, 1 tbsp Worcestershire sauce, 1 tbsp honey, and 0.5 cup water. Let this mixture simmer for 3-4 minutes until slightly thickened. The sauce should coat the back of a spoon but still be pourable. If it's too thick, add 1-2 tablespoons water to reach the right consistency.
Finish the Pork in the Sauce
Return the browned pork strips to the skillet and spoon the sauce over them. Increase heat to medium-high and cook for 2-3 minutes, stirring gently to coat each strip evenly. The pork will finish cooking in this sauce, absorbing all those smoky-sweet flavors while maintaining that crispy exterior.
Taste and adjust seasoning—you might want to add a pinch more salt or a splash of vinegar if needed. The sauce should balance sweet, smoky, and tangy flavors perfectly. If the sauce starts to thicken too much, add another 1-2 tablespoons water to keep it glossy and clingy.
Garnish and Serve Immediately
Transfer the pork strips to a serving platter and sprinkle generously with the 0.25 cup chopped fresh cilantro. The bright herb cuts through the richness and adds a fresh finish. Serve immediately while the pork is still crispy and the sauce is warm—this dish doesn't wait.
For best results, serve with toothpicks for easy handling. The strips should be tender yet still hold their shape, with a crispy exterior that gives way to juicy, flavorful meat. Each bite delivers that perfect balance of smoky paprika, sweet honey, and tangy vinegar—exactly what makes these pork strips irresistible.
Pro Tips For Making Bbq Pork Strips
- Trim the Fat First: Pork shoulder strips have that stubborn fat layer that never renders right in the pan. Use kitchen shears to snip it off before cooking—it cooks faster, browns better, and you won’t end up with greasy strips. (Yes, it’s tedious, but your crispy edges will make you forget the effort.) ---
- Sear in Batches: I learned this the hard way—crowding the pan drops the temperature, and your strips turn out greasy instead of caramelized. Work in single layers, and resist the urge to move them around. Let them develop that golden crust undisturbed for 2-3 minutes per side. ---
- Toast the Spices: Skip the pre-mixed rub and toast your smoked paprika and black pepper in a dry pan for 30 seconds until fragrant. It deepens the flavor without adding heat, and your pork won’t taste like you just sprinkled dust on it. (Pro move: Add a minced garlic clove to the pan while toasting.) ---
- Rest Under Foil: After searing, transfer strips to a foil-lined tray and tent loosely—traps steam but keeps them from drying out. Give them a solid 5 minutes off the heat before serving. I used to skip this, and the strips always ended up tougher by the time they hit the plate.
Pro cooking tips for this dish
High-Heat Searing
For that coveted crispy exterior, you need to sear the pork strips at medium-high heat until they develop a deep golden-brown crust. I use a cast-iron skillet—it retains heat beautifully and creates those perfect caramelized edges. The key is patience: let the strips cook undisturbed for 2-3 minutes per side before flipping. If you rush this step, you'll end up with uneven cooking or even charred bits. A quick test? The strips should release easily from the pan when ready. 🔥
Sauce Consistency
The sauce should be glossy but not watery—thick enough to cling to the pork but still pourable. If it's too thick, add 1-2 tablespoons water to loosen it up. I like to simmer the sauce until it coats the back of a spoon; this ensures it'll caramelize beautifully when tossed with the pork. The balance of apple cider vinegar and honey is crucial here—too much vinegar makes it sharp, while too much honey can overpower the smoky notes. Taste as you go!
Batch Cooking
Working in batches is essential for even cooking. If you try to crowd the pan, the strips will steam instead of sear, leading to soggy results. I recommend cooking half the pork strips first, then setting them aside while you finish the sauce. This way, the meat stays hot and ready to absorb all those smoky-sweet flavors when you toss it back in. Pro tip: Use a wire rack on a baking sheet to hold the cooked strips while you finish the rest—they'll stay crispy instead of sitting in their own juices.
Resting Time
After searing, let the pork strips rest for 2-3 minutes before tossing them in the sauce. This brief pause allows the juices to redistribute, ensuring each bite is tender and flavorful. Skipping this step can lead to dry, stringy meat. I also recommend resting the strips on a wire rack if you're prepping ahead—it keeps them crispy and prevents sogginess when reheating later. 💡
Garnish Like a Pro
Fresh cilantro isn't just for looks—it adds a bright, herbaceous note that cuts through the richness of the pork and sauce. I like to chop it finely and sprinkle it generously over the finished strips right before serving. For an extra touch, add a pinch of smoked paprika or a drizzle of hot honey if you're feeling fancy. The contrast of textures and temperatures (warm pork, cool garnish) makes every bite feel special.
Reheating Secrets
If you need to reheat these strips, toss them in a hot skillet with 1 tablespoon water or broth for 2-3 minutes**—this revives the crispy exterior and keeps the meat juicy. Microwaving is a no-go; it'll turn the sauce rubbery and the pork soggy. For meal prep, store the sauce and pork separately in airtight containers, then toss them together right before serving. The glaze will caramelize again, giving you that perfect crispy edge every time.
Nutrition facts
Frequently asked questions
Can I use regular pork chops instead of pork strips?
Not ideal—pork chops are too thick and will cook unevenly. For best results, stick with 1/4-inch thick pork shoulder strips (like Costco or Trader Joe's pre-cut). If you must use chops, slice them into 1/4-inch thick strips yourself for even cooking. The thin cut ensures perfect crispiness and quick cooking.
How do I make these pork strips extra crispy?
Pat the pork bone-dry before seasoning and sear in a hot cast-iron skillet with enough oil to coat the bottom. Cook undisturbed for 2-3 minutes per side until deep golden brown. After searing, rest on a wire rack (not a plate) to prevent steam from making them soggy.
Can I grill these pork strips instead of pan-searing?
Preheat your grill to medium-high heat and oil the grates well. Grill for 3-4 minutes per side, then finish with the sauce in a skillet over high heat. For extra smokiness, add 1/2 tsp smoked paprika to the sauce. Just watch closely—grill marks burn faster than stovetop!
What's the best way to store leftovers?
Store pork strips and sauce separately in airtight containers. The strips will stay crispy for 3 days in the fridge. To reheat, pan-sear with 1 tbsp water for 2-3 minutes to revive the crispiness. The sauce keeps 1 week refrigerated or 3 months frozen.
Can I make this recipe spicier?
Add 1/2 tsp cayenne pepper to the dry rub or 1 tsp hot sauce to the finished strips. For heat lovers, swap honey for hot honey and add 1/4 tsp red pepper flakes to the sauce. Start with small amounts—you can always add more!