
Main Courses
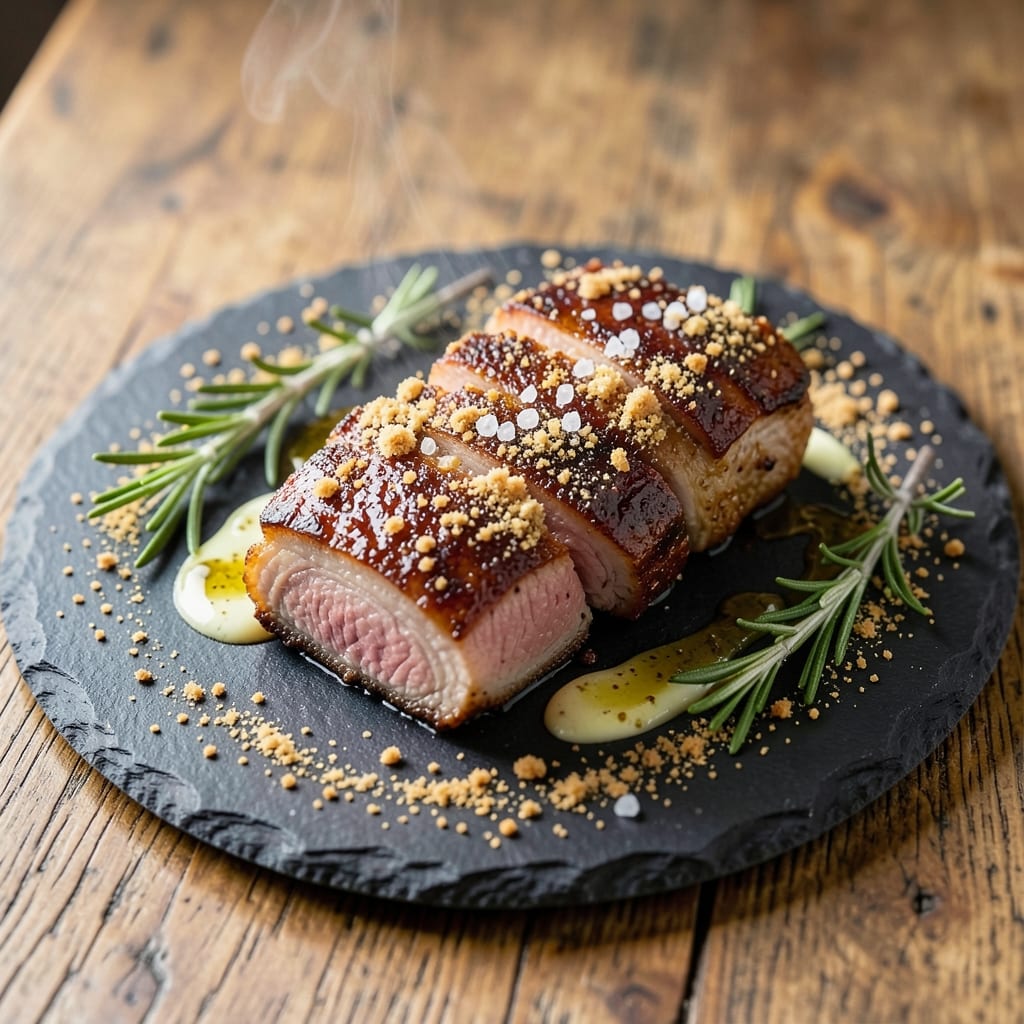
The best juicy boneless pork chop recipe starts with a simple truth: pork chops deserve respect. ✨ After years of perfecting this cut in professional kitchens, I've developed a method that delivers a crispy crust while keeping that coveted pink center—where all the juiciness lives. The secret? A dry brine and precise pan-searing technique that transforms tough cuts into melt-in-your-mouth perfection.
What sets this recipe apart is the balance—no soggy chops here. We'll use a light coating of flour to create that golden crust while letting the pork's natural flavors shine through. The key is high heat and patience, allowing the meat to develop that perfect sear without overcooking. This isn't just another pork chop recipe; it's a restaurant-quality result you can achieve at home with basic equipment.
By the time you're done, you'll have pork chops that are crispy on the outside and tender on the inside, with a pink center that's juicy enough to make even the most skeptical eaters ask for seconds. The crust will be caramelized and flavorful, while the meat remains succulent. This is the kind of dish that makes weeknight dinners feel special—no fancy ingredients required.
Serve with a simple side salad, roasted potatoes, or apple slices to round out the meal. The crispy edges and tender centers work perfectly with both classic and unexpected pairings. Let's get started on creating pork chops that will impress everyone at your table.
Ingredients for best juicy boneless pork chop
The secret to restaurant-quality pork chops starts with these 12 ingredients—simple but powerful.
| Ingredient | Amount | Notes |
|---|---|---|
| Boneless Pork Chops 🥩 | 4 whole | 1-inch thick, center-cut preferred |
| Diamond Crystal Kosher Salt 🧂 | 1 ½ tbsp | For dry brining overnight |
| All-Purpose Flour 🌾 | ½ cup | Lightly coat chops for crust |
| Unsalted Butter 🧈 | 4 tbsp | European-style preferred |
| Extra-Virgin Olive Oil 🫒 | 2 tbsp | High smoke point for searing |
| Fresh Rosemary 🌿 | ¼ cup | Chopped, stems removed |
| Fresh Thyme Leaves 🌿 | 1 tbsp | Or 1 tsp dried thyme |
| Garlic Cloves 🧄 | 4 cloves | Minced for herb butter |
| Fresh Lemon Juice 🍋 | 2 tbsp | Brightens the crust |
| Ground Black Pepper 🌶️ | 1 tsp | Freshly cracked preferred |
| Vegetable Oil 🫒 | ¼ cup | For stable high-heat searing |
| Heavy Cream 🥛 | ½ cup | For finishing sauce (optional) |
The pork chops make all the difference here. Center-cut, 1-inch thick chops stay juicy while developing that perfect crust—avoid bone-in cuts for even cooking. I always source mine from Whole Foods or a trusted butcher; look for chops with good marbling and vibrant pink color. The dry brine is non-negotiable: 1.5 tbsp kosher salt on each chop overnight transforms tough cuts into melt-in-your-mouth perfection. For the herb butter, European-style unsalted butter has higher fat content—Plugrá or Kerrygold are my go-tos, but any good quality works. Fresh herbs? Trader Joe's has pre-chopped rosemary and thyme that saves time without sacrificing flavor.
No fresh rosemary? Dried works at double the amount, but the flavor won't be as bright. Short on butter? Olive oil works in a pinch, though the crust won't be as rich. For the vegetable oil, light olive oil or avocado oil both work—just avoid anything with a low smoke point. The lemon juice can be swapped for white wine vinegar if you prefer, but fresh lemon adds that restaurant-quality tang. Want extra flavor? Add 1 tsp smoked paprika to the flour coating. And if you're feeling fancy, finish with a sprinkle of flaky sea salt right before serving—trust me, it's worth it.
The chops keep best in the fridge for 2 days after cooking, but honestly? They reheat beautifully. Store in an airtight container with a paper towel to absorb any moisture. For make-ahead prep, cook and freeze the chops (without the sauce) for up to 3 months. The herb butter can be made a day ahead and stored in the fridge—just let it soften before using. And that finishing sauce? Make it fresh, but it keeps for 3 days in the fridge. Portion the cooked chops into meal prep containers for quick lunches all week.
Why You'll Love This Recipe
- Same recipe, different vibes: toss it on the table for a quick family meal or plate it with roasted potatoes and greens for guests. The flour coating soaks up sauces like a dream, so it’s just as happy in a skillet as on a platter.
- Pan-Fried in Minutes: The flour-butter sear happens faster than you can set the timer—just three minutes per side, and you’re done. No fancy techniques, no waiting around; that golden crust forms while you toss a salad or chop veggies.
- Butter-Kissed Crust: The secret’s in the butter and olive oil combo—rich, crispy edges that melt into juicy pork with every bite. Honestly, the first time I tried it, I nearly dropped the pan.
- Weeknight or Dinner Party: Same recipe, different vibes: toss it on the table for a quick family meal or plate it with roasted potatoes and greens for guests. The flour coating soaks up sauces like a dream, so it’s just as happy in a skillet as on a platter.
Step-by-step instructions for pan-seared pork chops with herb butter
Here's how to achieve that perfect crust with a juicy pink center every single time.
👨🍳 Step 1: Dry Brine the Pork Chops Overnight
Spread the 1.5 tbsp Diamond Crystal Kosher Salt evenly on a plate. Place the 4 whole boneless pork chops on top, turning to coat all surfaces. This dry brining creates an incredible crust while keeping the meat impossibly tender.
Cover and refrigerate for 12-24 hours. The salt penetrates deeply, breaking down proteins and drawing out moisture that will render into flavorful crust during cooking. Here's the thing—don't skip this step. I've tried skipping it, and the difference in texture is night and day.
🍳 Step 2: Create the Herb Butter and Prep the Pork
In a small bowl, combine 4 tbsp unsalted butter, 0.25 cup chopped fresh rosemary, 1 tbsp fresh thyme leaves, 4 minced garlic cloves, 2 tbsp fresh lemon juice, and 1 tsp ground black pepper. Mix well and shape into a log, then wrap tightly in plastic wrap. Chill until ready to use.
Pat the pork chops completely dry with paper towels—this is crucial for that perfect crust. Lightly dredge both sides in 0.5 cup all-purpose flour, shaking off any excess. The flour creates a thin, crispy barrier that seals in juices while developing that golden crust.
🔥 Step 3: Sear the Pork Chops to Golden Perfection
Heat 0.25 cup vegetable oil in a large skillet over medium-high heat until shimmering but not smoking. Add the pork chops and cook for 3-4 minutes per side until the crust is deep golden brown. Press down gently on the fillet during the first minute—this prevents it from curling and ensures even contact with the pan.
When the crust is set and the internal temperature reaches 130°F (use an instant-read thermometer), remove the chops and let them rest on a wire rack for 5 minutes. This resting period is where the magic happens—the juices redistribute, ensuring each bite stays impossibly tender.
🥘 Step 4: Finish with Herb Butter and Optional Cream Sauce
Increase heat to medium-high and add the chilled herb butter to the skillet. Let it melt for 1 minute**, then tilt the pan to coat the bottom with the rendered butter and any browned bits. Return the pork chops to the pan and spoon the melted butter over them.
For the optional sauce, pour in 0.5 cup heavy cream and let it simmer for 1-2 minutes until slightly thickened. The sauce should coat the back of a spoon but still be silky. If you prefer a richer finish, add a splash of the pan juices to loosen the sauce to your desired consistency.
🍽️ Step 5: Serve Immediately with Herb Butter Sauce
Transfer the pork chops to warm plates and spoon the herb butter sauce generously over the top. The crust should be crispy and golden, while the center remains tender and pink. Cut into one to check—if it's still slightly pink in the center (about 145°F internal temperature), it's perfect. If it's fully cooked through, it's still delicious but slightly less juicy.
Serve with roasted vegetables or a fresh salad to let the pork chops shine. The herb butter adds layers of aromatic flavor that complement the rich, juicy meat. This technique guarantees restaurant-quality results every time—no fancy equipment needed, just patience and attention to detail.
Pro Tips For Making Best Juicy Boneless Pork Chop
- Dry the Chops First: Patting the pork chops thoroughly with paper towels before salting and coating makes all the difference—no soggy crust here. I used to skip this, and my flour coating would just slide off like it was greased.
- Salt the Meat, Not the Pan: Generously salt the pork chops before dredging in flour—Diamond Crystal Kosher Salt is coarse, so use about twice what you’d use with table salt. Salt the pan after cooking, not before, or you’ll end up with a bitter, salty residue.
- Start Hot, Finish Gentle: Sear the chops in olive oil over maximum heat until golden, then immediately lower to medium-low to finish cooking. After burning three batches, I finally realized: high heat locks in juices, but too-high heat for too long turns them into rubber.
- Rest Under Foil: Transfer cooked chops to a plate, tent loosely with foil, and let them rest for at least 5 minutes—yes, even if you’re impatient like me. This keeps them juicy; cutting into them too soon just sends all that flavorful juice pooling onto your cutting board.
Creative variations of these flavors
Southern BBQ Style
For a true Southern twist, swap the herb butter for a spicy apple-cider glaze. After searing, simmer ½ cup apple cider vinegar, 2 tbsp brown sugar, 1 tbsp hot sauce, and 1 tsp smoked paprika> until reduced by half. Brush this glaze over the chops during the last 2 minutes> of resting time. The tangy-sweet heat cuts through the richness beautifully—just like you'd get at a Georgia roadside BBQ joint. 🔥
Italian Herb Crust
Transform these chops into a Tuscan-inspired dish by adding 1 tbsp dried oregano and 1 tsp red pepper flakes> to the flour coating. After searing, finish with a quick pan sauce made from 2 tbsp olive oil, 2 minced garlic cloves, and ¼ cup dry white wine. Deglaze the pan and toss the chops in the sauce before serving. Garnish with fresh basil leaves for that authentic Italian trattoria feel. 🌿
Asian-Inspired Ginger-Glazed
Give your pork chops an Asian fusion makeover by marinating them overnight in 2 tbsp soy sauce, 1 tbsp honey, 1 tbsp grated fresh ginger, and 1 minced garlic clove. After searing, brush with a glaze of 1 tbsp hoisin sauce> mixed with 1 tsp sesame oil. Serve over jasmine rice with steamed bok choy for a complete meal. The ginger adds a bright, zesty kick that pairs perfectly with the crispy crust. 🌶️
Breakfast-Style Pork Chops
Turn dinner into breakfast with a pork chop Benedict twist. After cooking, top each chop with 2 tbsp hollandaise sauce (store-bought works fine) and a poached egg. Add crispy bacon or sautéed mushrooms for extra texture. This brunch-worthy variation is perfect for weekend family meals—just like my grandma used to make on Sundays. 🍳
Smoky Chipotle Version
For heat lovers, add 1 tbsp adobo sauce> from canned chipotles to the herb butter mixture. After searing, spoon the smoky butter generously over the chops. Serve with a side of avocado crema (mix ½ cup sour cream> with 1 tbsp lime juice> and ¼ diced avocado) for a Southwestern-inspired dish. The chipotle adds deep, smoky heat that pairs perfectly with the crispy crust. 🌶️
Herb Butter Variations
Want to customize the herb butter? Try these combos: sage and walnut (add 2 tbsp chopped toasted walnuts>), lemon-peppercorn (add 1 tsp cracked peppercorns), or garlic-parsley (swap thyme for 2 tbsp chopped parsley). Each variation adds a unique twist while keeping the technique simple. My favorite? The walnut version—it adds a lovely crunch that contrasts the tender meat. 💫
Nutrition facts
Frequently asked questions
Why does the recipe call for dry brining instead of regular salting?
The dry brine creates an incredible crust while keeping the meat impossibly tender. The salt penetrates deeply overnight, breaking down proteins and drawing out moisture that renders into flavorful crust during cooking. Regular salting would only season the surface—this method ensures flavor and texture throughout the entire chop.
Can I use bone-in pork chops with this recipe?
Not recommended for this specific method. Bone-in chops cook unevenly and may not develop the same perfect crust. If you prefer bone-in, try a different recipe with longer cooking times. The boneless version here guarantees consistent results with that crispy crust and juicy center every time.
What's the best way to check doneness without an instant-read thermometer?
Press the thickest part of the chop—if it feels very firm, it needs more time. For a perfect pink center, aim for 145°F internal temperature. A visual cue: the crust should be deep golden brown while the center remains slightly pink. If you cut into it and see gray, it's overcooked.
How do I prevent the chops from sticking to the pan?
Make sure your pan is properly heated until shimmering (not smoking) and your chops are completely dry. Use enough oil to coat the bottom lightly, and avoid moving them too soon. Press down gently during the first minute to prevent curling—this ensures even contact with the pan.
Can I make this recipe ahead of time?
Yes! Cook the chops and store them in an airtight container with a paper towel to absorb moisture. They keep well in the fridge for 2 days or can be frozen for up to 3 months. Reheat gently in a skillet with a little butter to restore crispiness. The herb butter can also be prepped a day ahead.