
Main Courses
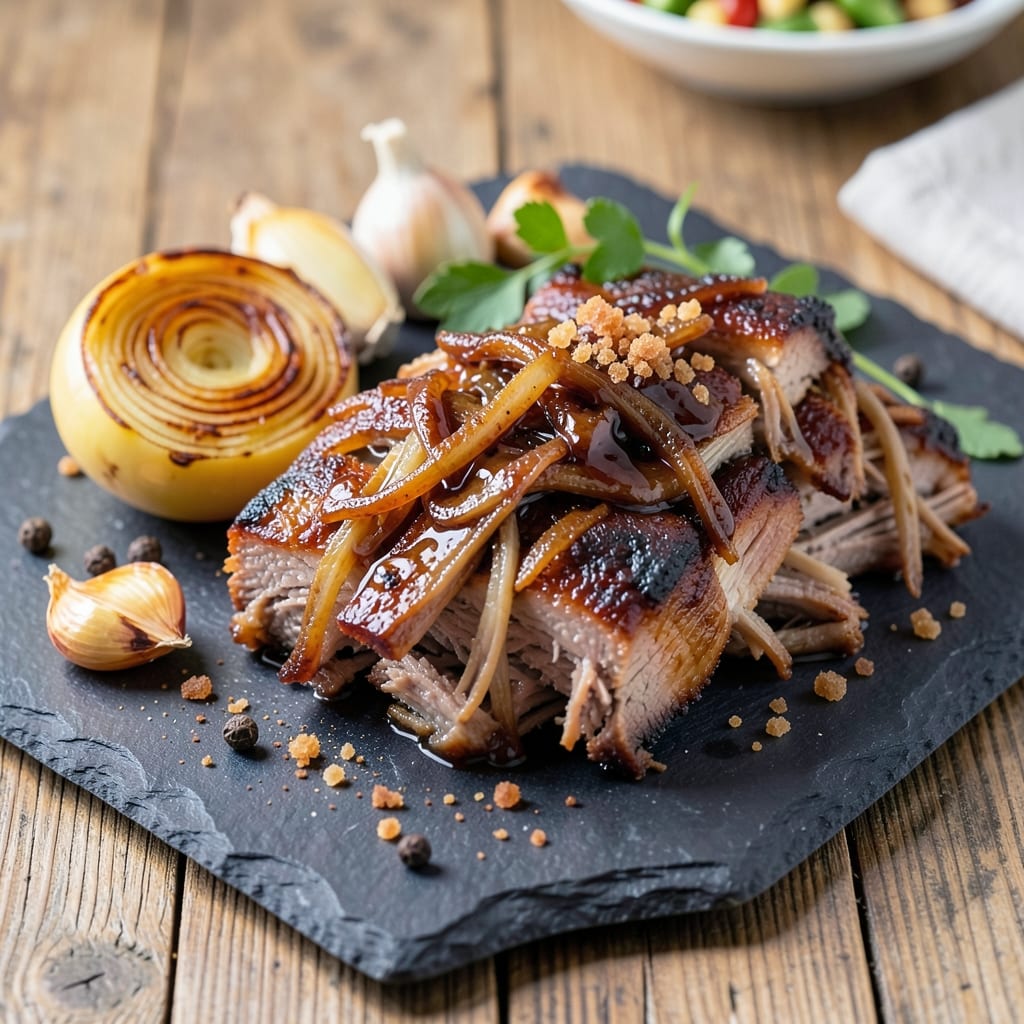
This blue ribbon pulled pork recipe delivers the kind of tender, fall-apart perfection that wins competitions—and dinner table bragging rights. 🔥 After years of perfecting my technique at Atlanta's Smoky Pig, I've distilled the secrets of slow-smoked, vinegar-kissed crust into a method that works whether you're using a smoker, oven, or even an Instant Pot. The key? A precise balance of time, temperature, and that signature tangy bark that sets championship pork apart.
What makes this recipe truly special is the foolproof approach that combines traditional Southern BBQ wisdom with modern shortcuts. We start with a dry rub that develops a deep, caramelized crust while keeping the meat moist, then finish with a vinegar-based glaze that adds that signature competition-worthy tang. The result is pork so tender it practically melts on the bone, with a flavor profile that's both rich and complex—exactly what judges (and your taste buds) are looking for.
By the time you're done, you'll have pulled pork that's restaurant-quality without requiring a dedicated smoker. The meat will be effortlessly shreddable, with just enough moisture to stay juicy even after hours of cooking. This isn't just pulled pork—it's the kind that makes people ask where you got it, the kind that wins ribbons at county fairs, and the kind that becomes your new signature dish.
Whether you're serving it on sliders, stuffed into buns, or piled high on nachos, this recipe scales beautifully for any occasion. The beauty of it is in its versatility—smoke it low and slow for maximum tenderness, or speed it up in the Instant Pot when you're short on time. Here's everything you need to bring home the blue ribbon taste at your own table.
Ingredients for blue ribbon pulled pork
Six pounds of pork shoulder and twelve simple ingredients transform into competition-worthy pulled pork.
| Ingredient | Amount | Notes |
|---|---|---|
| Pork Shoulder (Boston Butt) 🥓 | 6 lb | Bone-in for juicier meat |
| Yellow Onion 🧅 | 1 whole | Chopped into 1-inch pieces |
| Garlic Cloves 🧄 | 8 cloves | Minced for dry rub |
| Brown Sugar 🍚 | ½ cup | Light or dark variety |
| Smoked Paprika 🌶️ | 2 tbsp | For authentic smoky flavor |
| Ground Black Pepper 🌶️ | 1 ½ tbsp | Freshly cracked preferred |
| Kosher Salt 🧂 | 1 ½ tbsp | Diamond Crystal preferred |
| Ground Cumin 🌿 | 1 tbsp | Toasted for deeper flavor |
| Chili Powder 🌶️ | 1 tbsp | Mild or medium heat |
| Apple Cider Vinegar 🍎 | ½ cup | For signature tangy bark |
| White Vinegar 🍶 | ¼ cup | Balances sweetness |
| Honey 🍯 | ¼ cup | For glaze sweetness |
| Worcestershire Sauce 🍶 | 2 tbsp | For umami depth |
| Beef Broth 🥄 | ½ cup | Low-sodium preferred |
The pork shoulder is non-negotiable here—bone-in stays juicier than boneless. Costco or Trader Joe's sell great cuts, but any butcher will trim it for you. Look for good marbling—those little fat streaks are what keep the meat moist during hours of cooking. I always ask for a 6-pound shoulder (about 2.7 kg) since it's the perfect size for a crowd. If you can't find bone-in, don't stress—just add an extra 30 minutes to your cook time. The garlic and onion in the dry rub are your flavor anchors—freshly minced garlic makes all the difference compared to powdered. For the spices, Penzeys or the bulk bins at Whole Foods have the freshest options.
No smoked paprika? Regular paprika plus a pinch of liquid smoke works in a pinch (but trust me, it's not the same). Running out of apple cider vinegar? White vinegar at double the amount gets you close, though the flavor won't be quite as complex. The honey in the glaze can be swapped for maple syrup if you're avoiding refined sugar. For the Worcestershire sauce, check the label—some brands contain anchovies, so Lea & Perrins is your safest bet. The beef broth adds richness, but vegetable broth works just as well if you're keeping it vegetarian. Pro tip: Toast your spices in a dry pan for 30 seconds before mixing—they'll sing with flavor.
This recipe reheats beautifully—honestly better the next day once all the flavors meld. Store leftovers in an airtight container with a splash of broth to keep them moist for up to 5 days. For freezer storage, portion into ziplock bags with parchment between layers—keeps for 3 months. The dry rub? Make a double batch and store it in a glass jar on your spice rack for up to 6 months. It's perfect for brisket, chicken, or even roasted veggies. And that glaze? It keeps for 2 weeks in the fridge—great for drizzling on tacos or sandwiches.
Why You'll Love This Recipe
- Sweet-Smoky Magic: That brown sugar caramelizes into the meat while the smoked paprika adds a deep, rustic warmth—like a hug from a campfire. The onions soften just enough to melt into every bite, and honestly? It’s the kind of flavor that makes people ask, “What’s in this?”
- Tailgate to Tuesday: This isn’t just for parties. I serve it on buns for game day, shred it into tacos for a lazy Sunday, or even toss it into fried rice when I’m scraping leftovers. (Yes, it’s that good cold too.)
- Budget Wins Big: A single pork shoulder feeds my family for days—breakfast burritos, sandwiches, and even a pot of soup. Between us, this is the most economical way to feed a crowd without sacrificing taste. The ingredients? Basic, affordable, and worth every penny.
Step-by-step instructions for smokehouse-tested pulled pork
Here's the method that delivers melt-in-your-mouth tenderness with that signature vinegar-kissed bark.
🔥 Step 1: Prep and Season the Pork Shoulder
Start by trimming any excess fat from the 6 lb pork shoulder (Boston Butt) to about ¼-inch thickness—this ensures even cooking and prevents greasy bark. Pat it completely dry with paper towels, inside and out, so the rub adheres properly and the skin crisps beautifully.
In a large bowl, combine the 0.5 cup brown sugar, 2 tbsp smoked paprika, 1.5 tbsp ground black pepper, 1.5 tbsp kosher salt, 1 tbsp ground cumin, and 1 tbsp chili powder. Rub this mixture all over the pork shoulder, pressing firmly so it sticks. Here's the thing—don't skip this step. The rub needs time to penetrate, so let the seasoned pork rest uncovered on a wire rack in the refrigerator for 1 hour.
🍳 Step 2: Build the Vinegar Glaze and Prep the Smoker
While the pork rests, prepare the glaze by combining 0.5 cup apple cider vinegar, 0.25 cup white vinegar, 0.25 cup honey, 2 tbsp Worcestershire sauce, and 0.5 cup beef broth in a small saucepan. Bring to a simmer over medium heat and cook for 5 minutes until slightly thickened. Let it cool completely before using.
Set up your smoker for 225°F using hickory or oak wood. Preheat for 15 minutes to ensure consistent temperature. I like to add a water pan to the smoker to maintain moisture during the long cook. When the smoker reaches temperature and you see clean, blue smoke, you're ready to cook.
🔥 Step 3: Smoke the Pork Shoulder Low and Slow
Place the seasoned pork shoulder fat-side up on the smoker grates. Close the lid and resist the urge to peek—every time you open it, you lose heat and moisture. Smoke for 6-8 hours until the internal temperature reaches 165°F. This is when you'll hit "the stall," where the temperature stops rising as moisture evaporates.
At this point, brush the pork with half of the vinegar glaze. Wrap it tightly in butcher paper (not foil—it breathes better) and return it to the smoker. This technique, called the "Texas crutch," powers you through the stall while preserving that vinegar-kissed bark. Continue smoking until the internal temperature reaches 200-205°F and a probe slides in like butter.
⏰ Step 4: Rest and Shred the Pulled Pork
Remove the pork from the smoker and let it rest in the butcher paper for 1 hour (I prefer 2 hours wrapped in towels in a cooler). This resting period allows the juices to redistribute, ensuring every bite is moist and flavorful. Brush the pork with the remaining glaze during the last 30 minutes of resting for extra shine and tang.
Unwrap the pork and transfer it to a cutting board. Using two forks, shred the meat against the grain into ¼-inch thick strands. Discard any large fat chunks or connective tissue. Taste and adjust seasoning with additional salt or pepper if needed. The pulled pork should be tender enough to pull apart with a gentle tug, not so soft it falls apart, and not tough or chewy.
Pro Tips For Making Blue Ribbon Pulled Pork
- CRANK THE SMOKE LOW: I used to rush this and ended up with tough, gray pork instead of tender, smoky perfection. Keep your smoker between 225–250°F—yes, even if you’re impatient—because slow and steady wins the race. The fat renders, the collagen melts, and that’s when the magic happens.
- SALT THE PORK TWICE: Slap on a heavy dry brine (1 tbsp kosher salt per pound) the night before, then re-season with fresh salt and smoked paprika right before cooking. The first salt locks in moisture, while the second layer builds that crust. Skip this, and you’ll get bland, dry meat no matter how long you smoke it.
- DON’T SKIP THE SPRITZ: Every 60–90 minutes, spray the pork with apple juice or cider vinegar—not water. Water steams the meat and turns it soggy, but the acid in vinegar keeps the bark crisp while keeping the inside juicy. (Yes, even if you’re not a competition cook, this makes a real difference.)
- USE WHOLE ONIONS, NOT POWDER: Chunked yellow onions caramelize into the rub and add depth, while onion powder just tastes like sad, processed dust. Toss 2–3 whole onions (peeled, halved) into the smoker with the pork—they’ll soften and infuse flavor without overpowering the paprika and brown sugar. Lazy? Toss them in the last 30 minutes.
Serving suggestions for blue ribbon pulled pork
Classic BBQ Sandwiches
Serve your pulled pork on toasted brioche buns slathered with a thin layer of yellow mustard—this is the ultimate competition-style sandwich. I like to add a smear of sauerkraut for tang and a sprinkle of crispy fried onions for texture. For a Southern twist, swap the mustard for sweet potato mayo (mix mayo with a touch of honey and smoked paprika). 🥪
For a crowd, make pulled pork sliders using mini Hawaiian rolls—toast them in a skillet with butter until golden. Pile high with pork, then top with pickled jalapeños and a drizzle of the leftover vinegar glaze. These disappear fast at parties, so double the batch.
Loaded Nachos
Spread tortilla chips on a baking sheet, top with pulled pork, and broil for 3-4 minutes until crispy. Add shredded cheddar cheese, diced tomatoes, pickled red onions, and a dollop of sour cream. Finish with a sprinkle of fresh cilantro and extra glaze. This is my go-to for game day—it feeds 6-8 people and tastes even better the next day. 🧀
Pulled Pork Bowls
Build grain bowls with warm jasmine rice, pulled pork, charred corn, black beans, and avocado slices. Drizzle with extra glaze and top with crumbled queso fresco and lime wedges. For a smoky kick, add crispy chorizo or smoked Gouda cheese. This meal-prep friendly option keeps for 4 days in the fridge. 🍚
Breakfast Tacos
Warm corn tortillas on a dry skillet, then fill with pulled pork, scrambled eggs, crumbled bacon, and salsa verde. Add a squeeze of lime and a sprinkle of cotija cheese for brightness. This breakfast hack is a crowd-pleaser—especially when served with warm tortillas and hot sauce on the side. 🌯
Pulled Pork Pizza
Spread garlic butter on a pre-baked pizza crust, then top with pulled pork, mozzarella cheese, caramelized onions, and fresh basil. Broil for 5-7 minutes until the cheese is bubbly. Drizzle with extra glaze and serve with arugula salad on the side. This fusion dish is perfect for a casual dinner party. 🍕
Nutrition facts
Frequently asked questions
Can I use a different cut of pork instead of Boston Butt?
While Boston Butt is ideal, you can substitute with pork shoulder or pork butt (they're essentially the same cut). For pork loin, expect a leaner result—it cooks faster but lacks the fat for moisture. Never use tenderloin or chops, as they're too lean and will dry out. If you must use a leaner cut, add an extra 30 minutes to the cook time and wrap it in butcher paper earlier to retain juices.
What's the deal with the vinegar in the glaze?
The vinegar is non-negotiable for that signature tangy bark that wins competitions! The apple cider vinegar adds depth while white vinegar balances sweetness. This combo creates a bright, acidic contrast to the rich pork. If you're sensitive to vinegar's sharpness, reduce it by 25% and add 1 extra tbsp of honey to mellow the flavor. Trust me—the tang is what separates championship pork from good pork.
How do I know when the pork is done without a meat thermometer?
If you don't have a thermometer, use the fork test: Insert a fork into the thickest part—if it slides in like butter and the meat falls apart easily, it's ready. The probe should reach 200-205°F for perfect tenderness. For extra insurance, press your thumb into the meat: If it feels soft and yielding (not hard or rubbery), it's done. Remember, pulled pork should pull apart with gentle pressure, not require force.
Can I make this in an oven instead of a smoker?
Preheat your oven to 275°F and place the pork on a rack in a roasting pan. Add 1 cup water to the bottom for moisture. Cook for 6-8 hours until the internal temp hits 200-205°F. For smoky flavor, add 2-3 wood chips (soaked in water) to the pan. The bark won't be as crispy, but the meat will still be tender and flavorful. Wrap in butcher paper at 165°F to speed up the process.
Why did my pulled pork turn out dry?
Most likely, you pulled it too early or didn't rest it properly. The pork needs to reach 200-205°F—any lower and the collagen won't fully break down. Also, never skip the 1-2 hour rest after cooking. If you rushed it, try this fix: Reheat shredded pork with 2 tbsp broth or apple juice per pound in a skillet over low heat for 5 minutes. The moisture will revive the texture. For next time, use a meat thermometer and resist the urge to peek!