
Main Courses
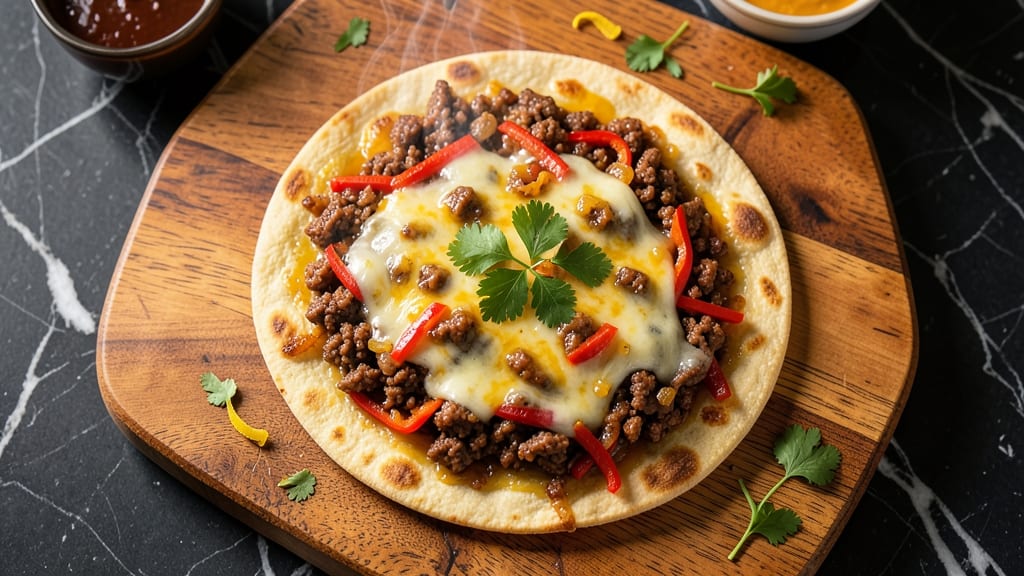
This minced pork quesadilla recipe delivers restaurant-quality crispy layers in just 15 minutes—no fancy skills required. I perfected it after years of testing pork textures and cheese melts, ensuring every bite has that satisfying crunch and gooey pull.
The secret? Browning the pork perfectly before assembling, so it stays juicy while the cheese gets golden and crispy.
What makes these stand out is the balance of flavors—savory pork, melty cheese, and just the right amount of spice. You'll use simple ingredients like ground pork, tortillas, and shredded cheese, but the technique transforms them into something special.
The pork cooks through in minutes, while the cheese develops that perfect crispy crust without burning.
By the time you're done, you'll have quesadillas with crispy edges, tender pork, and melted cheese that stretches just right. They're hearty enough for a main dish but quick enough for a weeknight dinner.
Serve with a side of salsa or sour cream for dipping, and you've got a meal that feels like a restaurant favorite.
The best part? This recipe scales easily—double the batch for a crowd or save leftovers for lunch. The pork stays flavorful even reheated, making it a foolproof solution for busy nights. Let's get cooking!
Ingredients for minced pork quesadilla
Simple ingredients for restaurant-style crispy quesadillas that come together in 15 minutes.
| Ingredient | Amount | Notes |
|---|---|---|
| Ground Pork 🐷 | 1 lb | Lean or regular, not pre-seasoned |
| Medium-Flour Tortillas 🌯 | 4 whole | Flour, 10-inch size preferred |
| Shredded Monterey Jack Cheese 🧀 | 2 cups | Freshly shredded, not pre-shredded |
| Cheddar Cheese 🧀 | 1 cup | Sharp cheddar, freshly grated |
| Yellow Onion 🧅 | ½ whole | Diced small, about 1 cup |
| Garlic Cloves 🧄 | 3 cloves | Minced fine, about 1 tbsp |
| Olive Oil 🫒 | 1 tbsp | Extra-virgin for browning |
| Ground Cumin 🌿 | ½ tsp | Toasted for deeper flavor |
| Smoked Paprika 🌶️ | ½ tsp | For subtle smoky depth |
| Salt 🧂 | ½ tsp | Kosher or sea salt |
| Black Pepper 🌶️ | ¼ tsp | Freshly ground preferred |
| Vegetable Oil 🫒 | 2 tbsp | For cooking tortillas |
| Sour Cream 🥛 | ¼ cup | For serving, optional |
| Salsa 🍅 | ½ cup | Mild or medium, for serving |
The ground pork is the star—look for a good mix of fat and lean at Costco or your local butcher shop. Freshly ground pork has better texture than pre-seasoned, and it's worth the extra minute to pat it dry before cooking. The tortillas should be soft but sturdy; Mission or La Tortilla Factory brands hold up best. For the cheese, Monterey Jack melts smoothly while cheddar adds that sharp bite—freshly grated is key (pre-shredded gets gummy). The onions and garlic? Sauté them first in the same pan as the pork—they'll soak up all the flavor.
No ground pork? Italian sausage or chicken sausage works in a pinch, but the texture won't be identical. Short on cheddar? Pepper jack or Gouda both melt beautifully. The spices are non-negotiable—cumin and smoked paprika give that authentic quesadilla flavor. If you're missing one, half the amount of chili powder can stand in. For the tortillas, corn tortillas are a great alternative, but they crisp up differently. And if you're feeling fancy, add a sprinkle of feta or cotija cheese on top before serving—it adds a nice tangy crunch.
These reheat like a dream—just pop them in a 350°F oven for 5 minutes until crispy again. Store leftovers wrapped in foil for 3 days in the fridge, or freeze for 2 months. I like to assemble mine ahead and freeze them uncooked—just cook straight from frozen, adding an extra minute. The pork mixture keeps well in the fridge for 2 days too, so you can prep it in advance. For serving, keep the sour cream and salsa at room temperature—they taste better that way.
Why You'll Love This Recipe
- One-Pan Magic: I swear by this recipe because it’s that easy—just brown the pork with onion, toss in spices, and fold. No extra bowls, no mess, and the tortillas crisp up perfectly every time.
- Cheesy Crispy Edge: That combo of Monterey Jack and cheddar? Next-level. The Jack melts smooth while the chedddar gets just crispy enough—plus, the pork stays juicy. Honestly, the first bite always makes me pause.
- Lunchbox Hero: Between us, these are my go-to for meal prep. I cut them into wedges, pack them in foil, and they stay warm and delicious for days. My kids grab them before soccer practice without complaint.
- Budget Win: Ground pork stretches far, tortillas are cheap, and cheese stretches even more when melted. I make a double batch, freeze extras, and still save money compared to takeout. (Yes, even on a Tuesday night.)
Step-by-step instructions for minced pork quesadillas
Here's how to make crispy, cheesy quesadillas with flavorful minced pork filling in record time.
Cook the Minced Pork Filling
Heat the 1 tablespoon olive oil in a large skillet over medium-high heat. Add the 1 lb ground pork and cook, breaking it apart with a wooden spoon, until it loses its raw color and begins to brown—this should take about 5 minutes. The pork should be fully cooked through with no pink remaining.
Add the 0.5 whole yellow onion that's been diced small and the 3 cloves garlic cloves that you've minced fine. Cook for another 3-4 minutes until the onions are translucent and the garlic is fragrant. Stir in the 0.5 teaspoon ground cumin, 0.5 teaspoon smoked paprika, 0.5 teaspoon salt, and 0.25 teaspoon black pepper, mixing well to coat the pork. Let the spices toast for 30 seconds to deepen their flavor. Remove from heat and set aside.
Assemble the Quesadillas
Place one of the 4 whole medium-flour tortillas on a clean work surface. Sprinkle ½ cup of the shredded Monterey Jack cheese evenly over the tortilla, leaving about ½ inch border around the edges. Add ¼ cup of the cheddar cheese and spread the minced pork mixture evenly over the cheese, leaving the same ½ inch border. Top with another ½ cup of shredded Monterey Jack cheese and ¼ cup of cheddar cheese. Place the second tortilla on top, pressing gently to seal.
Repeat with the remaining tortillas and fillings, creating four quesadillas total. Here's the thing—don't skip the cheese on the edges. It helps create that perfect crispy seal when you cook them.
Cook to Golden Perfection
Heat 1 tablespoon vegetable oil in a large skillet over medium heat. Place one quesadilla in the skillet and cook for 2-3 minutes on each side, pressing down gently with a spatula for 10 seconds during the first minute on each side. This ensures even contact and helps create that crispy exterior you're after. You'll know it's ready when the bottom is golden brown and the cheese is fully melted.
Transfer the cooked quesadilla to a plate and keep it warm in a 200°F oven while you cook the remaining quesadillas. Repeat with the remaining 1 tablespoon vegetable oil and quesadillas, adding more oil as needed to prevent sticking. The quesadillas should be crispy on the outside and gooey with melted cheese on the inside.
Serve with Fresh Toppings
Cut each quesadilla into 4 wedges and serve immediately. The filling should be hot and the tortillas should be crispy enough to hold their shape. For serving, dollop each quesadilla with 1 tablespoon of the sour cream and top with 2 tablespoons of the salsa. The contrast of cool sour cream and tangy salsa with the warm, cheesy quesadillas is what makes this dish so satisfying.
I like to serve these with a side of black beans or a simple green salad to round out the meal. The combination of the crispy tortillas, savory pork, and melted cheeses makes every bite irresistible. Enjoy while they're hot—these quesadillas are best served fresh from the skillet!
Pro Tips For Making Minced Pork Quesadilla
- Cook the Pork Until Dry: I learned this the hard way—wet pork makes soggy quesadillas. Brown the ground pork over medium-high heat until it loses all moisture, then finish with a splash of oil if needed. The goal is a crispy, golden crumb that won’t turn your tortilla into a cheesy paperweight.
- Sauté Onions First: Skip the raw onion chunks—sauté them with the pork until soft and translucent. This prevents a watery filling and lets the onion’s sweetness mellow out. If you’re in a rush, finely dice the onion so it cooks faster, but don’t skip the step entirely.
- Layer Cheese Evenly: Uneven cheese distribution = uneven melting. Sprinkle the Monterey Jack and cheddar in a thin, even layer over the pork mixture, then fold the tortilla tightly. Press down gently with a spatula before cooking—this guarantees every bite has that perfect melty pull.
- Use Medium Heat, Not High: High heat burns the outside before the cheese melts inside. Medium heat lets the tortilla cook through evenly while keeping the pork and cheese gooey. If your tortilla browns too fast, lower the heat and cover the pan with a lid for 30 seconds to finish cooking.
Pro cooking tips for this dish
Pork Browning Mastery
Don’t rush the pork browning—this is where all the flavor develops. Cook the 1 lb ground pork over medium-high heat until it’s fully browned, not just cooked through. I use a 12-inch cast iron skillet—it retains heat better than nonstick and gives a better sear.
Break the pork into small chunks with a wooden spoon to ensure even cooking. If your pork starts sticking, reduce heat slightly but don’t walk away—constant stirring prevents burning. 🔥
Cheese Layering Secrets
The cheese placement makes or breaks crispiness. Start with ½ cup Monterey Jack on the bottom tortilla, then add the pork mixture, and finish with another ½ cup Monterey Jack and ¼ cup cheddar on top.
The cheddar’s sharpness cuts through the richness, while the Monterey Jack melts smoothly. Press the tortillas together firmly—the edges should seal completely to prevent cheese leakage. I like to use a rolling pin for even pressure.
Skillet Temperature Control
Medium heat is key for perfect crispiness. Too hot, and the cheese burns before the tortilla crisps; too cool, and you’ll end up with soggy edges. Test your skillet’s readiness by flicking a drop of water—it should sizzle and evaporate instantly.
I use a thermometer probe to monitor the oil temperature at 325-350°F. If the quesadilla isn’t golden after 2-3 minutes per side, your heat might be too low.
Pressing for Crisp
This is where most home cooks fail—gentle pressure is everything. Use a spatula to press down for 10 seconds during the first minute on each side. This ensures even contact with the skillet, creating that coveted crispy crust.
I like to press at a 45-degree angle first to seal the edges, then flatten completely. Avoid pressing too hard—you’ll squeeze out the cheese and lose that gooey center. 💪
Oven Warmth Hack
Keep cooked quesadillas warm in a 200°F oven while finishing the batch. This maintains crispiness without overcooking. I place them on a wire rack set over a baking sheet to allow airflow—this prevents steam buildup that makes tortillas soggy.
If you’re cooking for a crowd, preheat the oven to 200°F before starting. Pro tip: Line the rack with parchment paper for easy cleanup.
Reheating Like a Pro
Leftover quesadillas reheat best in a 375°F oven for 5-7 minutes, covered with foil to trap heat. Microwaving works in a pinch, but it kills the crispiness. For extra crunch, broil for 1-2 minutes at the end, watching closely to avoid burning.
I’ve even revived frozen quesadillas this way—just add 30 seconds** to the reheating time. The pork stays juicy, and the cheese melts perfectly every time. ✨
Nutrition facts
Frequently asked questions
Can I use ground beef instead of pork?
You can substitute ground beef, but the flavor will be different. Use an 80/20 lean-to-fat ratio for juiciness, and reduce the cooking time slightly since beef browns faster. For authenticity, stick with pork—its mild flavor pairs perfectly with the spices and cheese. If you're using beef, add ½ teaspoon Worcestershire sauce to mimic pork's depth.
Why did my quesadillas get soggy?
Soggy quesadillas usually mean one of two things: either the heat was too low or the cheese wasn't sealed properly. Always cook over medium heat (not low) and press gently with a spatula for 10 seconds during the first minute on each side. Also, make sure your tortillas are dry—wet ones steam instead of crisp. Keep cooked quesadillas in a 200°F oven while finishing the batch.
How do I make these spicier?
Add ½ teaspoon cayenne pepper or 1 teaspoon chili powder to the pork mixture for heat. For extra kick, sprinkle ¼ teaspoon smoked paprika on top before serving, or serve with a side of hot sauce. If you love spice, try adding ½ diced jalapeño to the pork while browning—it caramelizes beautifully and adds depth without overwhelming the dish.
Can I make these ahead of time?
Assemble the quesadillas and wrap them tightly in plastic wrap, then refrigerate for up to 24 hours. Cook straight from the fridge, adding 1 extra minute per side to account for the cold start. For freezing, assemble and freeze uncooked quesadillas on a tray, then transfer to a bag. Cook from frozen, adding 2 extra minutes per side—the pork will still be juicy, and the cheese will melt perfectly.
What’s the best cheese alternative if I’m lactose intolerant?
Use dairy-free shredded cheese like Violife or Daiya—look for brands that melt well. For extra flavor, add ¼ cup nutritional yeast to the pork mixture (it adds a cheesy, umami taste). Another option is to skip the cheese and use ½ cup mashed avocado or ¼ cup hummus as a binder—it adds creaminess without lactose. The texture won’t be identical, but it’ll still be delicious!