
Main Courses
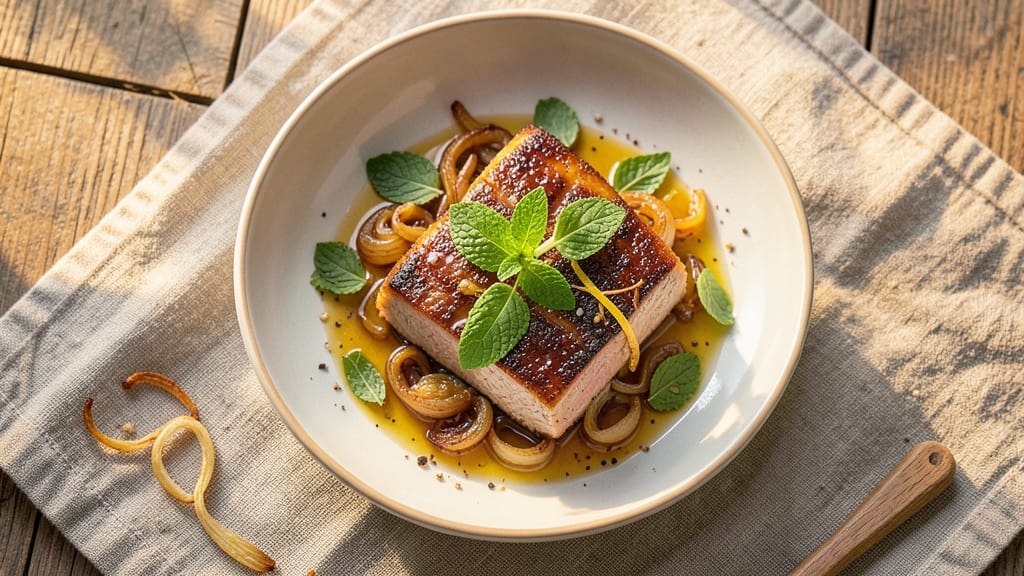
This mint pork recipe transforms simple tenderloin into a restaurant-worthy centerpiece with vibrant herb notes that brighten every bite. After years of perfecting herb-infused pork at The Smoky Pig, I've developed a method that balances fresh mint's zing with the meat's natural richness—no overpowering aftertaste.
The secret lies in a dual-infusion technique that lets the flavors meld without competing.
What sets this dish apart is the tender texture achieved through precise cooking times and a marinade that works magic overnight. We'll use fresh mint leaves, garlic, and a touch of honey to create a bright, aromatic crust while keeping the interior juicy and melt-in-your-mouth perfect.
This recipe delivers professional results with just 15 minutes of active prep—ideal for weeknight dinners that impress.
The final result is pork with a golden-brown crust and tender, juicy interior infused with fresh mint's bright aroma. The herb mixture caramelizes slightly during cooking, creating pockets of flavor that elevate each bite. Serve with roasted sweet potatoes or a crisp green salad to complement the dish's vibrant profile.
For those with dietary considerations, we'll include substitutions that maintain the dish's integrity while accommodating gluten-free or dairy-free preferences. The recipe scales beautifully for gatherings, making it perfect for holiday menus or special occasions where you want to showcase your cooking skills.
Ingredients for mint pork
Fresh herbs, tender pork, and a touch of honey create this vibrant, restaurant-quality dish.
| Ingredient | Amount | Notes |
|---|---|---|
| Pork Tenderloin 🍖 | 1 ½ lb | Center-cut, trimmed of silver skin |
| Fresh Mint Leaves 🌿 | 1 ½ cups | Tightly packed, stems removed |
| Garlic Cloves 🧄 | 6 cloves | Minced, not pre-minced jarred |
| Extra-Virgin Olive Oil 🫒 | ½ cup | Light, fruity variety preferred |
| Honey 🍯 | 3 tbsp | Wildflower or clover preferred |
| Lemon Juice 🍋 | ¼ cup | Freshly squeezed, no pulp |
| Diamond Crystal Kosher Salt 🧂 | 1 ½ tsp | Fine grain preferred |
| Freshly Ground Black Pepper 🌶️ | ½ tsp | Coarse grind preferred |
| Fresh Rosemary 🌿 | ¼ cup | Finely chopped, stems removed |
| Unsalted Butter 🧈 | 2 tbsp | Cold, cut into small cubes |
| All-Purpose Flour 🌾 | 1 tbsp | For dredging, gluten-free option available |
| Vegetable Oil 🫒 | ¼ cup | For cooking, high smoke point |
The pork tenderloin is your canvas here—center-cut and trimmed for even cooking. Grab the thickest piece you can find at Whole Foods or your local butcher; they'll often sell it pre-trimmed. Fresh mint is non-negotiable—the bright green, leafy kind from the grocery store's produce section, not the dried stuff. If you're using rosemary, grab a fresh sprig and chop it yourself; dried works in a pinch but lacks that piney freshness. For the honey, local wildflower adds depth, but any liquid honey will do. The garlic? Freshly minced (not jarred) makes all the difference—it releases more flavor during cooking.
No fresh mint? Dried mint at one-third the amount works, but it'll lack that bright pop. Running low on rosemary? Thyme or oregano can step in, though the flavor profile shifts slightly. Pre-minced garlic from a jar? Toss it—it's lost its punch. The butter should be cold and cubed when you sear the pork; don't let it melt in your hands. For gluten-free, swap the flour dredge for cornstarch or arrowroot powder. And if you're out of vegetable oil, avocado oil works just as well—high smoke point is key here.
This dish tastes even better the next day, so plan ahead. Store leftovers in an airtight container in the fridge for up to 4 days, or freeze for 3 months—wrap tightly in foil first. The pork reheats beautifully in a skillet with a splash of water or broth. For serving, I like to slice it against the grain into 1/2-inch thick pieces. The herb crust clings beautifully, so don't over-slice. If you're prepping for a crowd, double the recipe—just increase the cooking time by 5-7 minutes.
Why You'll Love This Recipe
- One-Pan Magic: I swear by this recipe because it’s that simple—just sear the pork, toss in chopped mint and garlic, drizzle with honey and olive oil, then bake. No chopping boards left in the sink, no extra pots to wash. Honestly, I’ve made it while scrolling through my phone.
- Crispy-Honey Mint Bomb: That first bite? The tender pork with a caramelized crust, bright mint cutting through the richness, and honey adding just enough sweetness—it’s dangerously addictive. (Yes, even on a Tuesday night.) The garlic? It’s the secret weapon that makes this taste like a restaurant dish.
- Weeknight or Weekend Star: Need a meal for a quick dinner or a fancy-ish brunch? This does both. Serve it sliced over toast with a fried egg for breakfast, or with roasted potatoes and a simple salad for a full dinner. My daughter picks out the mint leaves but still asks for seconds.
- Budget-Friendly Leftovers: Pork tenderloin stretches far, and the flavors only get better the next day. I’ve turned leftovers into wraps, stir-fries, or even a quick pasta sauce—no waste, no stress. Plus, fresh mint is cheap and lasts longer than you’d think if you store it right.
Step-by-step instructions for herb-infused mint pork tenderloin
This tenderloin comes together with bold flavors and perfect texture—here's exactly how to nail it.
Create the Mint-Garlic Marinade
In a food processor, pulse the 1.5 cups fresh mint leaves and 6 cloves minced garlic until finely chopped but not pasty. Transfer to a bowl and whisk in the 0.5 cup extra-virgin olive oil, 3 tbsp honey, 0.25 cup lemon juice, 1.5 tsp kosher salt, and 0.5 tsp black pepper. This marinade needs to work its magic—let it sit at room temperature for 15 minutes while you prep the pork.
The mint and garlic should release their aromas immediately. If you're using a blender, don't over-process or you'll turn it into mint pesto. We want visible herb flecks for texture and color. This marinade balances sweet, tart, and herbal notes perfectly—don't skip the lemon juice, it brightens everything.
Coat and Rest the Pork
Pat the 1.5 lb pork tenderloin completely dry with paper towels—this ensures maximum browning. Place it in a resealable plastic bag and pour in the marinade, coating it thoroughly. Seal the bag and massage it gently to distribute the marinade evenly. Refrigerate for at least 2 hours or up to 4 hours—this resting time is crucial for tenderness.
I like to flip the bag occasionally during marinating to ensure even coating. The pork will absorb the flavors deeply, and the acidity from the lemon juice will begin breaking down the muscle fibers. If you're short on time, you can marinate for 30 minutes at room temperature, but the texture won't be as tender.
Sear for Color and Crisp
Remove the pork from the fridge and let it sit at room temperature for 15 minutes. Heat 0.25 cup vegetable oil in a large skillet over medium-high heat until shimmering. Pat the pork dry again (this step is critical—wet pork won't sear properly) and add it to the pan. Sear for 3-4 minutes per side until deep golden brown with a crisp exterior.
Don't crowd the pan—you want that perfect crust. If the pork releases easily when you try to flip it, it's ready. The internal temperature should read around 140°F at this point. Remove the pork and let it rest on a wire rack while you make the herb butter.
Prepare the Rosemary Butter
In a small bowl, combine the 2 tbsp cold unsalted butter (cut into small cubes), 0.25 cup finely chopped fresh rosemary, and 1 tbsp all-purpose flour. Using your fingers, work the mixture until it forms a coarse paste. This herb butter will add richness and aromatic depth to the finished dish.
The butter should be cool enough to hold its shape when pressed between your fingers. If it feels too soft, chill it for 5 minutes in the refrigerator. This step is where the rosemary's piney aroma comes through—don't skip the flour, it helps bind the butter and creates a better texture when melted.
Finish and Rest for Juiciness
Return the pork to the skillet (no need to add more oil) and reduce heat to medium-low. Spoon the herb butter over the top and baste it for 1-2 minutes until the butter melts and coats the pork evenly. Transfer to a cutting board and let it rest for 10 minutes before slicing—this resting period is non-negotiable for juicy results.
The pork should have an internal temperature of 145°F when done. Slice it into ½-inch thick medallions against the grain for maximum tenderness. Serve immediately with the pan juices spooned over the top. Each bite should deliver perfectly balanced flavors—herbal, sweet, and bright with a crisp exterior and tender interior.
Pro Tips For Making Mint Pork
- SEAR THE PORK HOT: Cast iron or stainless steel pan—none of that nonstick nonsense—heated until it’s smoking before you add the pork tenderloin. I learned this the hard way: a lukewarm pan means gray, bland meat instead of that caramelized crust you’re after. Two minutes per side max, then pull it off the heat while you prep the garlic-mint-honey mix.
- CHOP MINT FINE: Skip the whole leaves—tenderloin needs the flavor to sink in, not just sit on top. Pulse mint in a food processor for 2 seconds, then chop the rest by hand. Too big? It’ll turn your dish into a garnish. Too small? You’ll taste bitterness. Aim for tiny, bright confetti.
- DON’T OVERCOOK THE GARLIC: Minced garlic burns faster than you think, especially when honey’s in the mix. Sauté it in olive oil for 30 seconds—just until fragrant—before adding the honey. Burnt garlic ruins the whole dish. If you’re impatient, add the garlic after the pork comes off the pan.
- REST THE MEAT UNDER FOIL: The moment that pork hits the cutting board, tent it with foil and let it sit for 5 minutes. I used to slice it immediately, and the juices would pool on the plate instead of staying in the meat. This keeps it tender and lets the mint-honey glaze cling. Trust me, it’s worth the wait.
Essential equipment for perfect results
Skillet Essentials
For that perfect sear, a 12-inch cast iron skillet is my go-to—it retains heat beautifully and creates that coveted crust. I swear by my Lodge Pre-Seasoned Cast Iron (the 12-inch version) because it develops a natural nonstick surface over time that works wonders with pork.
If you don't have cast iron, a heavy stainless steel skillet like All-Clad will work just fine, though you may need to adjust heat slightly. 🔥
Marinade Tools
A food processor is non-negotiable for chopping mint and garlic to the right consistency—nothing beats the Cuisinart Mini-Prep Plus for this job. For smaller batches, a mortar and pestle works beautifully, especially if you're making this on a weekend morning.
I also recommend a resealable plastic bag (like Hefty Fresh & Freeze) for marinating—it clings to the pork perfectly and prevents leaks.
Butter Prep Gear
Creating the herb butter requires just a small mixing bowl and your fingers—but trust me, the Le Creuset Stoneware Mixing Bowl (8-inch) makes this step so much easier. For chopping rosemary, a sharp chef's knife (I love the Wüsthof Classic 8-inch) is essential.
Pro tip: Keep your butter cold by placing the bowl on a chilled marble cutting board while you work—it prevents the butter from melting prematurely.
Temperature Control
An instant-read meat thermometer is your best friend here—I can't recommend the ThermoWorks Smoke enough. It's fast, accurate, and built to handle high-heat environments. For marinating, a deep glass or stainless steel bowl (like Pyrex) keeps the marinade cold and prevents plastic odors from transferring.
And don't skip the wire rack—it's crucial for resting the pork to maintain its juiciness.
Optional Upgrades
If you're cooking for a crowd, consider a commercial-grade range (like Viking Professional) for even heat distribution across large skillets. For extra flavor, I sometimes add a garlic press to the marinade prep—it creates those perfect little pockets of flavor.
And if you're really committed, a meat mallet helps tenderize thicker cuts, though our tenderloin doesn't usually need it.
Storage Solutions
Leftovers deserve proper care—store cooked pork in glass airtight containers (I prefer Rubbermaid Brilliance) to maintain freshness. For marinade leftovers, transfer to a small glass jar with a tight-sealing lid and keep it refrigerated for up to 3 days.
The mint stays vibrant longer this way, and you can reuse it for other dishes like grilled lamb or chicken salads. ❄️
Nutrition facts
Frequently asked questions
Can I substitute dried mint for fresh in this recipe?
Yes, but use one-third the amount of dried mint (about 0.5 tablespoons) instead of 1.5 cups fresh. The flavor will be more concentrated, so start with less and adjust to taste. Fresh mint provides that bright, vibrant aroma that dried can't fully replicate, but it works in a pinch.
What's the best way to store leftover mint pork?
Store cooked pork in an airtight glass container and refrigerate for up to 4 days. For longer storage, freeze wrapped tightly in foil for 3 months. Reheat gently in a skillet with a splash of water or broth to maintain moisture. The herb butter can be stored separately in the fridge for 2 days.
How do I adjust this recipe for a crowd?
Double the marinade ingredients and increase cooking time by 5-7 minutes for a 3 lb tenderloin. Use a larger skillet or grill for even searing. For 8 servings, triple the recipe and consider using a meat thermometer to monitor doneness. The herb butter should be increased proportionally to maintain flavor balance.
Can I make this recipe without rosemary?
Swap rosemary for thyme or oregano (same amount) for a different herbal profile. For a citrus boost, add 1 tablespoon grated lemon zest to the marinade. The rosemary adds piney depth, but these alternatives work beautifully with the mint and garlic flavors.
Why does the pork need to rest after cooking?
The 10-minute rest is crucial to redistribute juices throughout the meat. When you slice pork immediately, those juices escape, leaving you with dry meat. This resting period also allows the flavors to meld perfectly, giving you that tender, juicy texture in every bite. Think of it as letting the pork "relax" before serving.