
Main Courses
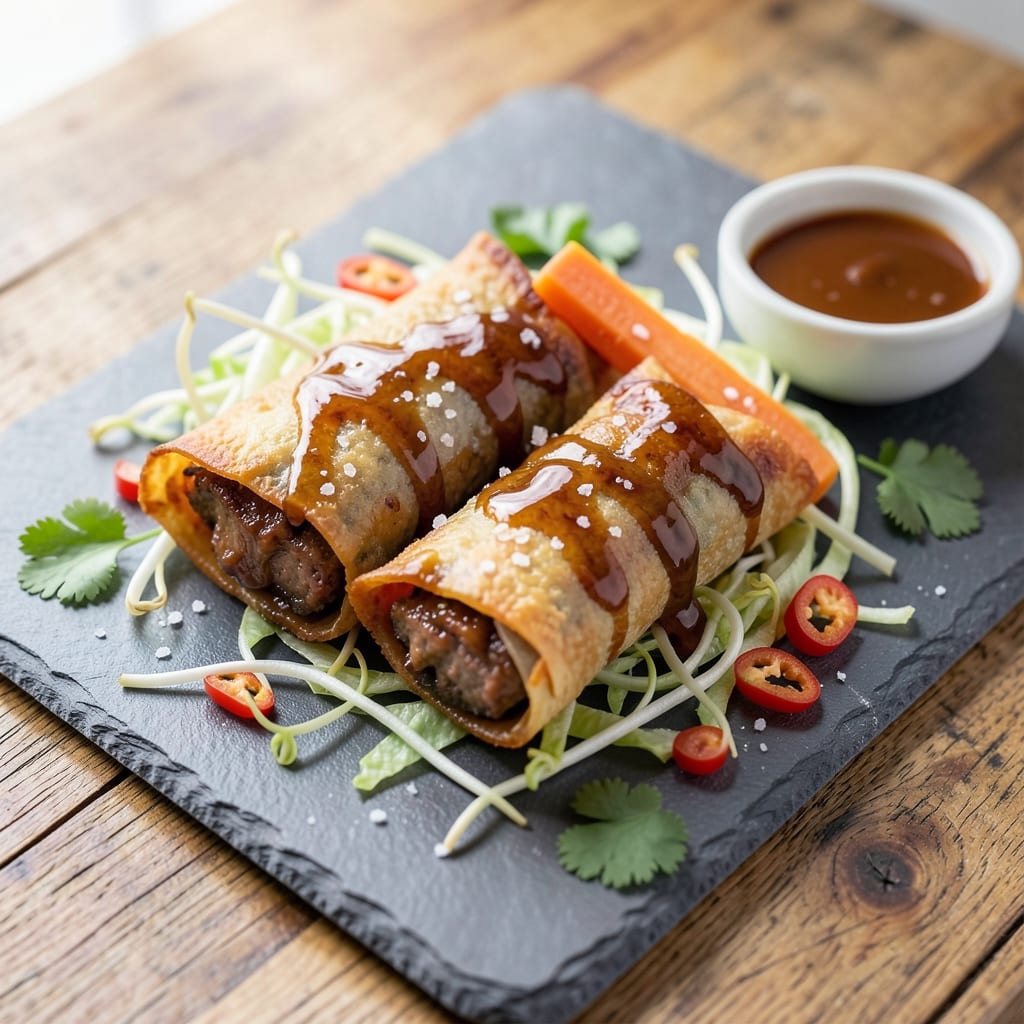
This BBQ pork spring rolls recipe delivers the perfect balance of crispy wrappers and smoky-sweet filling that'll have everyone asking for seconds. 🔥 After perfecting the technique over years of testing, I've cracked the code for achieving that signature crunch without deep-frying—whether you're pan-frying or air-frying. The secret lies in properly prepping the wrappers and cooking the filling just until tender, not mushy.
The filling starts with tender pork shoulder marinated in a bold BBQ sauce blend, then combined with crunchy vegetables like cabbage, carrots, and bean sprouts. I always use a mix of store-bought wrappers and homemade versions for extra authenticity, though gluten-free options work beautifully too. The key is keeping everything cold until the last minute to maintain that perfect texture.
What you'll end up with is golden, shatteringly crispy spring rolls that stay crunchy even after serving. The filling remains juicy and flavorful, with that perfect balance of smoky, sweet, and slightly tangy BBQ notes. These are ideal for appetizers, party platters, or even a light main course with a side of sweet chili sauce.
The best part? This recipe scales effortlessly—make a double batch for gatherings and freeze extras for quick meals. Whether you're serving them hot from the fryer or air-fried to perfection, these spring rolls always disappear fast. Let's get cooking!
Ingredients for bbq pork spring rolls
Crispy, smoky, and packed with bold flavors—these ingredients make magic happen!
| Ingredient | Amount | Notes |
|---|---|---|
| Pork Shoulder 🐖 | 1 lb | Boneless, cut into 1-inch cubes |
| Spring Roll Wrappers 🍱 | 12 pieces | Rice paper or wheat flour |
| Green Cabbage 🥬 | 2 cups | Shredded, thinly sliced |
| Carrots 🥕 | 1 cup | Julienned, medium size |
| Bean Sprouts 🌱 | 1 cup | Fresh, rinsed well |
| BBQ Sauce 🍯 | ½ cup | Store-bought or homemade |
| Garlic Cloves 🧄 | 4 cloves | Minced, fresh preferred |
| Fresh Ginger 🌿 | 1 tbsp | Grated, finely chopped |
| Soy Sauce 🥢 | 1 tbsp | For extra umami |
| Vegetable Oil 🫒 | ¼ cup | For frying, high smoke point |
| Sesame Oil 🌰 | 1 tsp | For finishing, toasted |
| Salt 🧂 | ½ tsp | Kosher or sea salt |
| Black Pepper 🌶️ | ¼ tsp | Freshly ground |
| Sweet Chili Sauce 🍶 | ¼ cup | For dipping, optional |
The pork shoulder is your secret weapon here—it stays juicy while the wrappers get crispy. Costco or Trader Joe's usually have pre-cut boneless pork, but if you're buying a whole shoulder, ask the butcher to cube it for you. Look for good marbling, which means more flavor. Spring roll wrappers? Rice paper is traditional, but gluten-free wheat flour wrappers work if you need a substitute. Keep them sealed in the fridge until ready to use—dry wrappers get brittle. For the BBQ sauce, I always grab Sweet Baby Ray's or make my own with ketchup, vinegar, and spices—both give that perfect smoky-sweet balance.
No pork shoulder? Chicken thigh works in a pinch (it's juicier, so trim extra fat), or tofu for a plant-based version—just marinate it longer. Fresh ginger? Substitute with 1/2 tsp ground ginger, but it won't have the same zing. The bean sprouts can be swapped for shredded cabbage or coleslaw mix if you're in a hurry. For the wrappers, homemade rice paper is ideal, but store-bought rice paper sheets are a game-changer if you're short on time. The sweet chili sauce is optional but adds that perfect tangy kick—Duke's or Sriracha are solid choices if you want to DIY.
Pork stays fresh for 3-4 days in the fridge, but cook it within 2 days for best texture. Wrappers? Store them in a sealed container with a damp paper towel to keep them pliable. The filling can be prepped a day ahead—just keep it cold until you're ready to roll. These spring rolls reheat beautifully—air fry at 375°F for 3-4 minutes to restore that crispy texture. Freeze extras in a single layer before bagging for up to 2 months. Trust me, they taste even better the next day!
Why You'll Love This Recipe
- Crispy in Minutes: The pork shoulder gets tenderized in the slow cooker, then sliced thin—no chopping marathon needed. Roll them while the kids watch TV; no one’s waiting around.
- Sweet-Savory Magic: That sticky BBQ glaze on the pork? It’s the star. The cabbage and carrots add crunch, but the bean sprouts take it over the top—fresh, bright, and ridiculously satisfying.
- Lunchbox Hero: Pack them for work or school—they hold up better than most takeout. Honestly, I’ve sent these in my son’s lunch three times this week, and he’s never complained (yet).
- Budget Crowd-Pleaser: Pork shoulder stretches far, and the veggies are cheap. Make a double batch, freeze half, and thank me later when you’re feeding a house full of hungry people for under $10.
Step-by-step instructions for BBQ pork spring rolls
Get ready for golden, crispy spring rolls packed with smoky-sweet pork filling!
🔥 Step 1: Cook the Pork Shoulder Until Tender
In a large skillet, heat 2 tablespoons of the vegetable oil over medium-high heat. Add the 1 lb pork shoulder cut into 1-inch cubes and cook for 5-6 minutes until the meat browns slightly on all sides. This searing step locks in juices and builds flavor.
Push the pork to one side of the pan and add the 4 cloves minced garlic cloves and 1 tbsp grated fresh ginger. Stir for 30 seconds until fragrant. Pour in the 0.5 cup BBQ sauce and 1 tbsp soy sauce, then sprinkle with 0.5 tsp salt and 0.25 tsp black pepper. Stir to combine, then reduce heat to medium-low and cover. Simmer for 10-12 minutes until the pork is tender and the sauce has thickened slightly. Let it cool completely before using.
👨🍳 Step 2: Prepare the Fresh Vegetable Filling
In a large bowl, combine the 2 cups shredded green cabbage, 1 cup julienned carrots, and 1 cup rinsed bean sprouts. Give everything a gentle toss with your hands to distribute the vegetables evenly. This light mixing prevents the filling from becoming too dense when wrapped.
Add the cooked pork mixture to the vegetable bowl and stir gently to combine. Taste and adjust seasoning if needed—you want a balance of smoky, sweet, and slightly salty flavors. The filling should be moist but not soupy, ready to be wrapped in the spring roll wrappers.
🥘 Step 3: Assemble the Spring Rolls
Fill a shallow dish with warm water—this prevents the wrappers from drying out. Working quickly, dip one spring roll wrapper at a time into the water for 5-10 seconds until pliable but not soggy. Lay it flat on a clean surface and place about 2 tablespoons of the pork-vegetable filling near the bottom corner.
Fold the bottom corner over the filling, then fold in the left and right sides. Roll tightly away from you, tucking the filling as you go. Place the completed spring roll seam-side down on a plate. Repeat with the remaining wrappers and filling, working efficiently to keep the wrappers from drying out.
🔥 Step 4: Fry Until Golden and Crispy
Heat 0.25 cup vegetable oil in a deep skillet or wok over medium-high heat until the oil shimmers—it should be hot enough to sizzle when you add a spring roll. Fry the spring rolls in batches (don't overcrowd the pan) for 2-3 minutes per side until they turn a deep golden brown and are crispy all over.
Transfer the fried spring rolls to a paper towel-lined plate to drain excess oil. Here's the thing—if they're not golden brown yet, they're not done. Keep frying until you see that perfect crispy texture. The key is patience; crispy spring rolls are worth the wait!
🍽️ Step 5: Serve with Sweet Chili Sauce
Let the spring rolls rest for 2-3 minutes before serving. This brief rest helps the filling set slightly and makes them easier to handle. Drizzle lightly with 1 tsp sesame oil for extra aroma and flavor.
Serve the spring rolls immediately with the 0.25 cup sweet chili sauce on the side for dipping. The contrast of crispy, smoky-sweet spring rolls with the tangy-sweet sauce is what makes this dish truly irresistible. Enjoy while warm for the best texture!
Pro Tips For Making Bbq Pork Spring Rolls
- Prep Pork Thin: Slice the pork shoulder against the grain into ¼-inch strips—thinner than you think you need. I used to fight this step, but it actually cooks faster and stays juicier when wrapped. (Yes, even if you’re impatient like me.) ---
- Blanch Cabbage First: Shock the green cabbage in boiling water for 30 seconds, then ice bath—it softens without wilting. I learned this the hard way after rolling soggy, limp spring rolls that fell apart at the first bite. ---
- Seal Edges Tight: Brush the wrapper edges with a tiny bit of water before folding—it creates a stronger seal than just licking. (And yes, your future self will thank you when they don’t unravel in the fryer.) ---
- Double-Fry for Crisp: Fry once at 350°F until golden, drain, then finish at 375°F for 2 minutes—this second crisp is what separates "meh" from "perfect." I skip this when I’m lazy, but the difference is noticeable.
Storing and reheating your bbq pork spring rolls
Refrigerator Storage
Store your cooked spring rolls in an airtight container with a paper towel pressed on top to absorb moisture. They’ll keep fresh in the fridge for up to 3 days, but I find they’re best enjoyed within 24 hours for maximum crispiness. The wrappers stay pliable longer if you avoid stacking them—arrange them in a single layer. 🥬
Freezer Prep Tips
For long-term storage, freeze uncooked spring rolls on a baking sheet for 30 minutes to prevent sticking, then transfer to a freezer bag with parchment paper between layers. They’ll keep for up to 2 months. When ready to cook, thaw in the fridge overnight—never microwave directly from frozen or the wrappers will turn soggy. 🍳
Reheating Crispy Texture
To revive that golden crunch, air fry at 375°F for 3-4 minutes—this is my go-to method. If you’re frying, use fresh oil in a clean pan over medium-high heat for 2-3 minutes per side until crispy again. Microwave reheating? Skip it—it’ll make the wrappers rubbery. For extra flavor, brush with a little sesame oil before reheating. ✨
Make-Ahead Filling
Prep the pork-vegetable filling a day ahead and store it in an airtight container in the fridge. The flavors meld beautifully overnight, and the veggies won’t get mushy if kept cold. Just assemble and fry fresh—this shortcut saves time without sacrificing taste. I always do this when hosting, so I’m not stuck in the kitchen last-minute. 💡
Wrappers 101
Store unopened spring roll wrappers in the fridge or pantry, but never freeze them—they’ll crack. If you’ve opened the package, wrap them in a damp paper towel inside a sealed container to keep them flexible. Homemade rice paper wrappers? Store them submerged in water in the fridge for up to 1 week. Trust me, dry wrappers are a nightmare to work with! 🌱
Party Platter Hack
For gatherings, assemble spring rolls ahead but don’t fry them—keep them raw in the fridge. Fry in batches as guests arrive so they stay crispy. Store cooked extras in a warm oven (200°F) for up to 1 hour to maintain temperature. This keeps the filling warm and the wrappers from getting soggy while you enjoy the party. 🎉
Nutrition facts
Frequently asked questions
Can I use chicken instead of pork in these spring rolls?
Yes! Chicken thigh works beautifully—it stays juicy even after frying. Just marinate the chicken in the BBQ sauce for at least 30 minutes (or overnight) to ensure tender, flavorful pieces. Use 1 lb boneless chicken thigh cut into 1-inch cubes and follow the same cooking instructions as the pork. For extra moisture, trim any visible fat before cooking.
How do I make these spring rolls without deep-frying?
Try air-frying for a lighter but still crispy result! Preheat your air fryer to 375°F and spray the basket lightly with oil. Place the assembled spring rolls in a single layer and cook for 8-10 minutes, flipping halfway, until golden brown. For oven-baked versions, brush with oil and bake at 400°F for 15-18 minutes, turning once. The texture won't be as crispy as fried, but it's a great alternative.
Why did my spring rolls turn out soggy?
Soggy spring rolls usually happen from one of three things: overcrowding the pan, not enough oil, or filling that's too wet. For perfect results, fry in batches with enough oil (0.25 cup per batch) to submerge half the spring roll. Also, make sure your filling isn't dripping wet—squeeze excess moisture from veggies like bean sprouts, and avoid overmixing the pork mixture. Let them rest 2-3 minutes after frying before serving to help the filling set.
What's the best way to keep spring roll wrappers from drying out?
Store unopened wrappers in the fridge or pantry, but if you've opened the package, wrap them in a damp paper towel inside a sealed container. For homemade rice paper wrappers, keep them submerged in water in the fridge. When using, dip each wrapper in warm water for just 5-10 seconds—any longer and they'll get too soft. Work quickly and keep a bowl of warm water nearby while assembling to maintain flexibility.
Can I make these spring rolls gluten-free?
Use gluten-free spring roll wrappers made from rice flour or cornstarch. Most Asian markets carry these, or check the gluten-free section of larger grocery stores. The cooking method stays the same—just be extra careful with the frying temperature (medium-high heat) to achieve that perfect crisp. Gluten-free wrappers tend to crisp up faster, so watch them closely and fry in smaller batches if needed.